Configuring Client Auto-Update (BaoTa Panel)
Notes
Original author: hy黑影
Reposted by: Zkitfly
Some content has been slightly polished
This tutorial is reposted from https://www.mcbbs.net/thread-1103864-1-1.html
Preface
- The server I run has many different sub-servers, and the client version of each sub-server is different, yet I wanted to merge them all into a single client. I looked around and found that those auxiliary update programs can only update a single client version, and their interfaces are not very nice-looking; at one point I even wanted to develop my own launcher………
- The inspiration for this post comes from a feature of the HMCL launcher, Export Server Auto-Update Modpack. I thought this feature could be used to replace some auto-update auxiliary programs.
- Implementing the whole feature requires: a server with a public IP, a client modpack, and the HMCL launcher; if you have none of these, then just spend 10 RMB instead
- This tutorial assumes the reader is a beginner, i.e. someone who has never worked with HTTP servers or web application development, does not understand Linux systems, and is afraid of console programs
Tutorial
Step 1 - Rent a Server (▲If you already have a server with a public IP, skip this step)
- Search Baidu for Tencent Cloud student plan or Alibaba Cloud student plan
- You will see plans at 10 RMB/month. If you choose Alibaba Cloud, select the lightweight application server; Tencent Cloud only has one plan
- For the system, choose CentOS 8.0 64-bit; leave the rest at their defaults
- Double-check that it really is ten yuan; if so, buy it directly. If not, you have probably already bought a student plan before
- The first purchase may require real-name verification; just follow the prompts. There is no need to worry about security issues—they are all reliable large companies
Step 2 - Install the BaoTa Panel — CentOS 8.0 System
Taking Tencent Cloud as an example; Alibaba Cloud works the same way
Open the console panel and find the student server you just rented
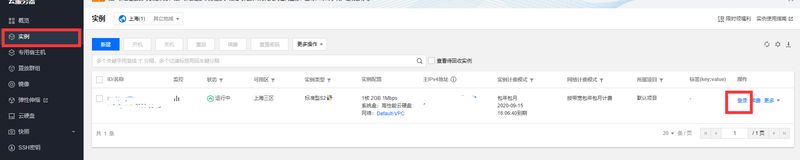
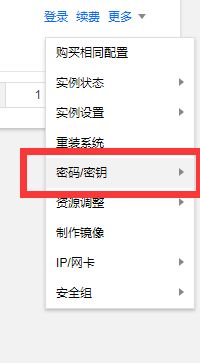
Choose Reset Password
Click the Log in button on the right and fill in the password you just reset as instructed; you should then see a prompt similar to this

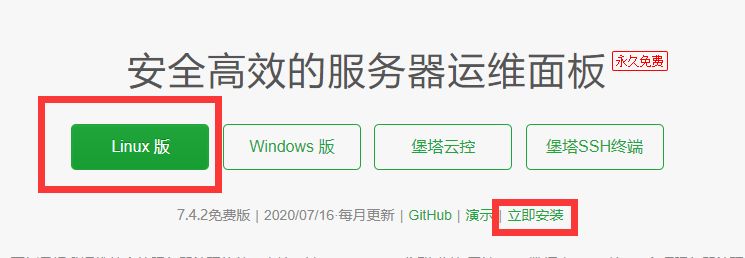
Don’t panic, stay calm. If part of the tutorial below stops working, go to the BaoTa Panel official website, click Linux -> Install Now
Back in the console panel, we need to open some ports so that the panel can be accessed; choose Security Group
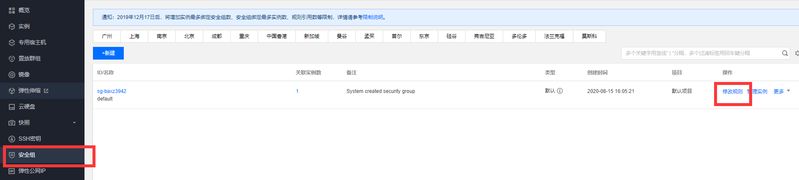
Click Modify Rules, then click Add Rule
Figure 1:
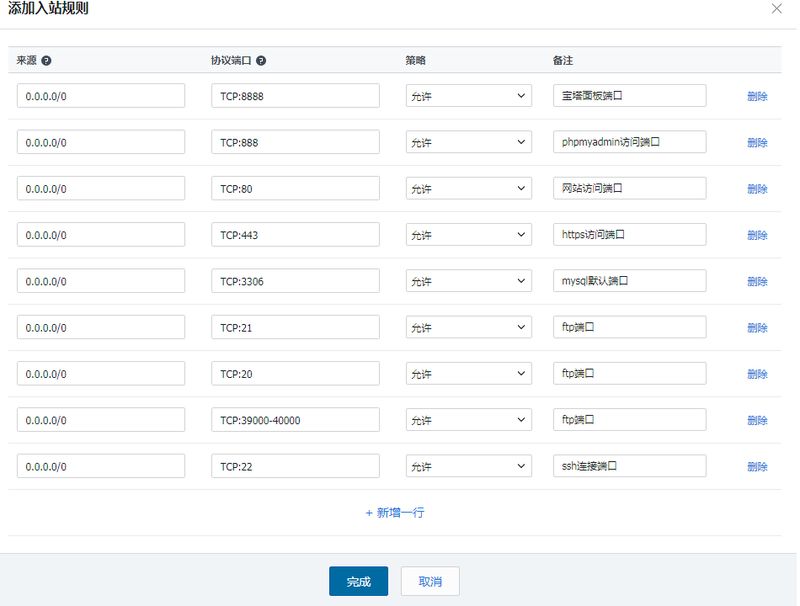
Figure 2:
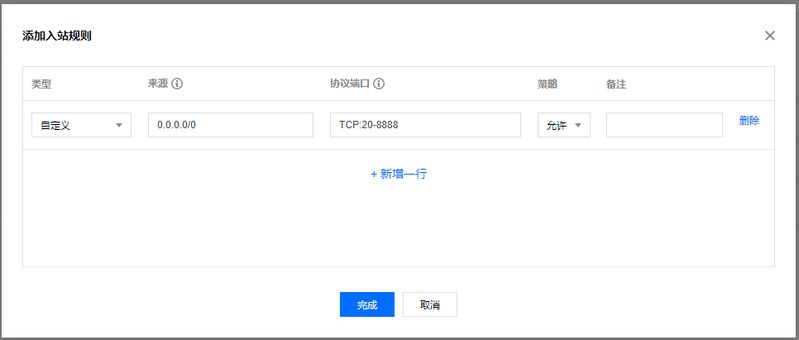
Add the rules as shown in the figures: follow Figure 1 for better security, or Figure 2 if you are lazy
Back in that black window, enter
yum install -y wget && wget -O install.sh https://download.bt.cn/install/install_6.0.sh && sh install.shand press EnterA large amount of English text will scroll by. When it stops, look carefully: the last line asks whether you want to install (it shows y/n at the end). Type y and press Enter
Wait patiently for about five minutes until this text appears
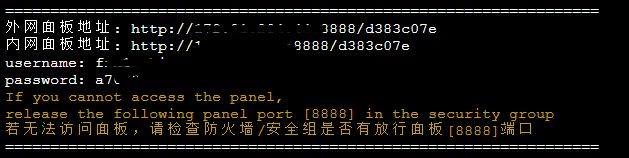
Copy the public panel address. On the page that opens, enter the content after username for the username and the content after password for the password
Click Log in, and the panel installation is complete
Step 3 - Set Up an HTTP Static File Server
Open the BaoTa panel you just set up. It usually prompts you to install a suite; choose the nginx suite and install it
After the installation completes, choose Website and click Add Site
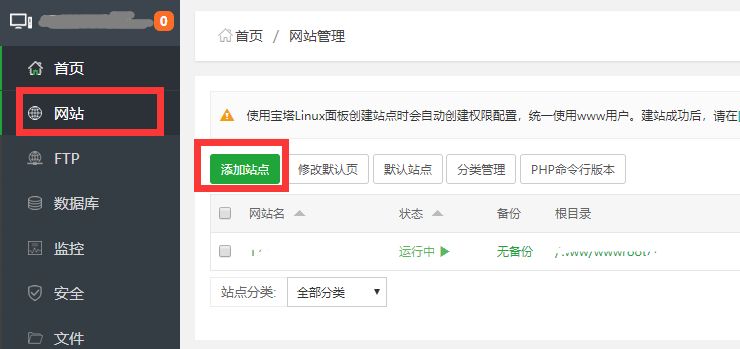
On the page that appears, fill in the site IP, which is the one in the address bar; for example: mine is https://233.88.233.44:8888/site, so I fill in 233.88.233.44
In addition, those who rented a VPS should ask the provider for the IP address and open ports; for example, if I was given 123.21.123.21:6666, then I fill that in
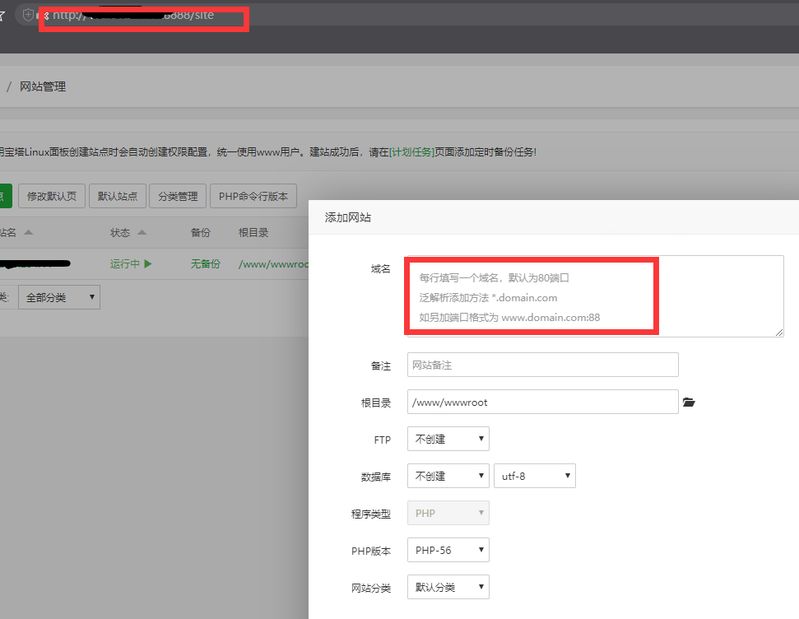
Leave everything else unchanged. At this point you have already set up the HTTP static file server ✔
Step 4 - Create the Modpack
Use HMCL to open your MC client
Select your game version and click Export Modpack
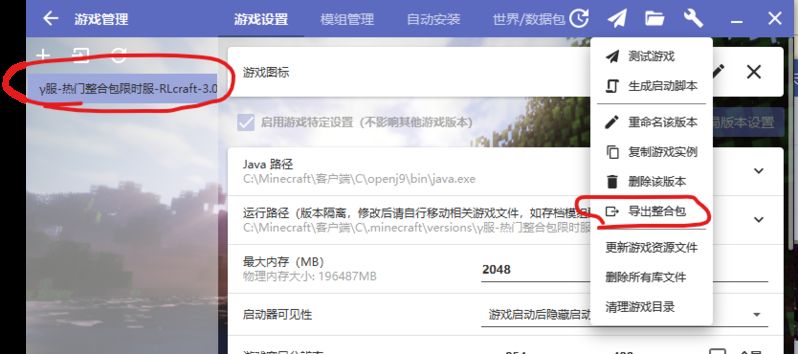
Choose Server Auto-Update Modpack
Fill in the relevant information:
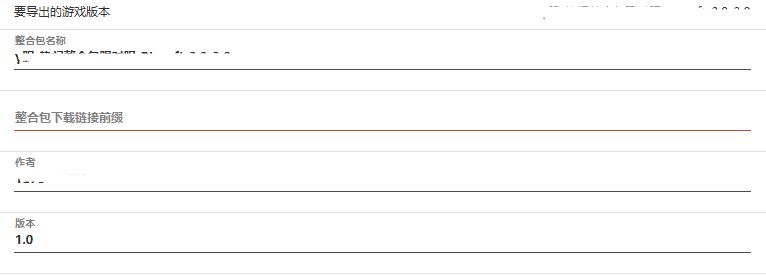
Modpack download URL prefix: for example, just now in Step 3 - Set Up an HTTP Static File Server I filled in 233.88.233.44 in the BaoTa panel, and I want to distinguish versions, with this version code being a; then I fill in https://233.88.233.44/a, VPS users note that the port number must also be written ▲
Write 1.0 as the version number; for later updates write 2.0, and so on
Click Next, and the export is complete
Step 5 - Upload the Modpack
Open the BaoTa panel, choose Files, find the corresponding directory, and create a new folder under the corresponding IP directory; for example, the version code I just wrote is a, so I create a folder named a
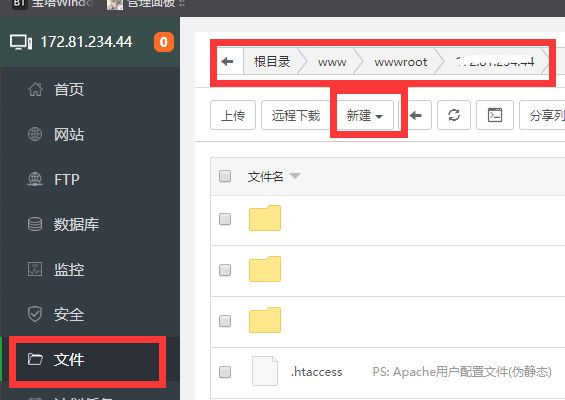
Upload the modpack you just exported into the newly created folder and extract it; on success it looks like the image below
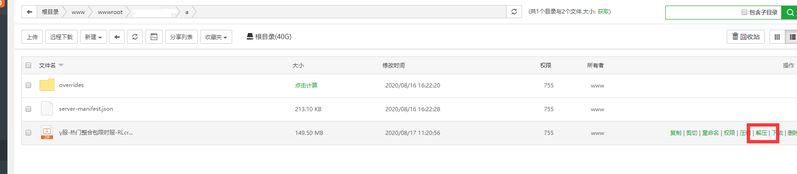
If you are updating the modpack, overwrite the files in this 【a】 folder when extracting
Step 6 - Distribute the Modpack
- All done! You can now upload and share this modpack you just exported with your players!
Step 7 - Test the Modpack
- To prevent slip-ups from causing problems with the modpack, you can test the modpack you are about to distribute before distributing it
Follow-up
- From now on, each time you update the client, just repeat Step 4 and Step 5; players will automatically receive the update after restarting the client
- Remember to update the version number
- The default update method will not delete mods that players added themselves, but it will download mods that players deleted
- The update overwrites all the data from when the modpack was exported
- Each update downloads server-manifest.json from the link provided by the modpack to verify the player’s local modpack. If verification finds that the modpack has no file with a matching name, or that the file with a matching name has a mismatched hash, that file will be downloaded; files with matching names and matching hashes will not be downloaded
- I think 1 MB of outbound bandwidth is enough, unless you want players to download all the content themselves (that is, delete all mods before distributing the modpack to others, so that players will start downloading them back when they launch; the advantage of this is that the visible modpack size becomes smaller)