Configuring Client Auto-Update (Nginx)
Before reading this article, please read this article first
Prerequisites
To read this article, you need the following background knowledge:
- Mastery of basic
linuxcommand operations, such ascd,ls, etc. - Have a
linuxserver (this probably doesn’t count as knowledge)
Installing Nginx
This part is very basic (but full of pitfalls), so it is skipped here; you can refer to the following document.
https://zhuanlan.zhihu.com/p/515069497
Creating a Static Resource Folder
To save trouble, I directly created a MinecraftClientStatic folder under the root directory /, and from now on all files that need to be served as static resources go in there.
Commands:
# Go to the root directory
cd /
# Create a folder
mkdir MinecraftClientStatic
# Configure folder permissions to prevent nginx from being unable to access it
chmod 777 MinecraftClientStatic
# Enter the folder
cd MinecraftClientStatic
# Create a test file
touch helloMC.html
# Grant file permissions
chmod 777 helloMC.html
# Edit the HTML content
vim helloMC.html
Here, to test whether the static resources are configured correctly, we need to create a static test file named helloMC.html; you can write a couple of arbitrary lines in this file.
For example:
<!-- helloMC.html -->
<h1>hello static!</h1>
You can also make it fancier (optional):
<!-- helloMC.html -->
<!DOCTYPE html>
<html>
    <head>
        <meta charset="UTF-8">
        <title>MC Client Static Resources</title>
        <meta name="viewport" content="width=device-width, initial-scale=1, maximum-scale=1, user-scalable=no" />
        <style>
            @font-face{
                font-family:'calligraffittiregular';
                src:url("fonts/calligraffitti-regular-webfont.ttf")
            }

            * {
                margin: 0;
                padding: 0;
            }

            body {
                overflow: hidden;
            }

            #content{
                position: absolute;
                color: white;
                top: 30%;
                left: 50%;
                margin-left: -121px;
            }

            p{
                font-family: calligraffittiregular
            }

        </style>
    </head>

    <body>
        <div id="content">
            <p style="font-size:  40px;font-weight: 1000;">MinecraftClientStatic</p>
        </div>
        <canvas id="hacker" style="width:100%;height:100%;">Please use the latest browser</canvas>
    </body>

</html>
<script type="text/javascript">
    window.onload = function() {
        var color_array = ['#00FF00','#00FF99','#00FFCC','#00FFFF','#00BBFF','#0066FF','#0000FF','#5500FF','#7700FF','#9900FF','#CC00FF','#FF00FF'];
        var i=0;
        var color;
        function changColor() {
            color = color_array[i];
            console.log(i++);
            console.log(color);
            if(i>color_array.length-1){
                i=0;
            }
            setTimeout(changColor, 2000);
        }

        var hacker = document.getElementById("hacker");
        var width = hacker.width = screen.width;
        var height = hacker.height = screen.height;
        var ctx = hacker.getContext('2d');
        var num = Math.ceil(width / 12);
        var y = Array(num).join(0).split('');
        var draw = function() {
            ctx.fillStyle = 'rgba(0,0,0,.05)';
            ctx.fillRect(0, 0, width, height);
            ctx.fillStyle = color;
            ctx.font = '12px Microsoft YaHei';
            y.map(function(y1,i){
                var text = String.fromCharCode(65 + Math.random() * 62);
                var x = i * 12;
                var y1 = y[i];
                ctx.fillText(text, x, y1);
                y[i] = ( y1 > Math.random() * 10 * height ? 0 : parseInt(y[i]) + 12 );
            })
        }

        Run();

        function Run() {
            changColor();
            Game_Interval = setInterval(draw, 50);
        }
    }
</script>
Assigning a Subdomain (Optional)
If you do not have a domain name, you can skip this part here, and directly use the server IP address wherever a domain name is needed later
Let us assume our domain name is buggzd.com
Create a new A record in DNS (when the address is ipv6, use an AAAA record). Taking minecraft.buggzd.com as an example here, set the record name to minecraft and the record address to the server address, as shown below.

Now we have a subdomain minecraft.buggzd.com. After adding it, you can use cmd to ping this domain minecraft.buggzd.com; if the correct IP address is returned, it has been assigned successfully.
ping minecraft.buggzd.com
Configuring nginx.conf
Locate the nginx configuration file directory: (if the nginx command is not available here, it means your nginx installation was not successful)
nginx -t
Output
nginx: the configuration file /etc/nginx/nginx.conf syntax is ok
Here /etc/nginx/nginx.conf is the path of the Nginx configuration file. Then cd to the nginx configuration directory.
cd /etc/nginx
# Edit the configuration file
vim nginx.conf
Because the blog reverse proxy was configured before, nginx.conf will carry the previous configuration records; do not mess them up—getting the hierarchy right is important!
# This is the hierarchy of nginx.conf
# Every nginx.conf configuration file has only one http block, so if nginx was configured before
# you only need to paste the content in the server block, placing the server block inside the http block.
http {
    server { ... }
    server { ... }
    server { ... }
}
The configuration to fill in:
http {
    server {
        # The port number to listen on; this can be left unchanged
        listen 80;
        # Change localhost here to the domain name assigned above
        server_name  minecraft.buggzd.com;
        location / {
            # After root is the location of the corresponding static resource folder
            root /MinecraftClientStatic;
            # This is the default index html to load; here it is the test file just created
            # It looks it up starting from inside the root directory folder, so do not write /MinecraftClientStatic/helloMC.html
            index helloMC.html;
        }
    }
}
Q: What does the configuration above do?
A: For example, when you visithttp://minecraft.buggzd.com/test.png,nginxwill access the local/MinecraftClientStatic/test.pngand then return it.
Once nginx.conf has been written correctly, you need to make nginx reload the configuration file.
nginx -s reload
Then directly visit the domain minecraft.buggzd.com you just configured; by default it will jump to the helloMC.html page you wrote. You can also visit http://minecraft.buggzd.com/helloMC.html
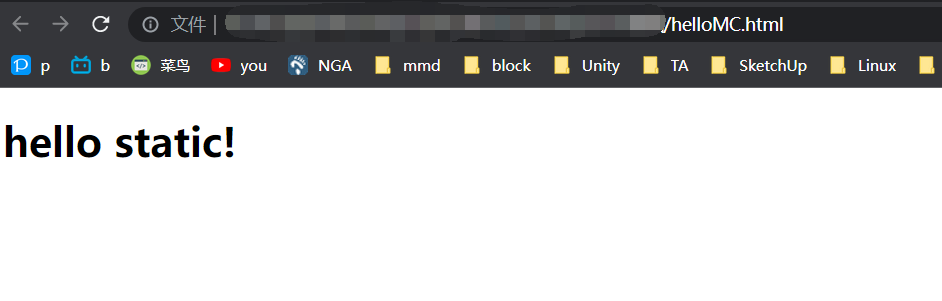
When the content of helloMC.html appears on the page, it means the configuration has succeeded! Try putting an image into the static resource folder.
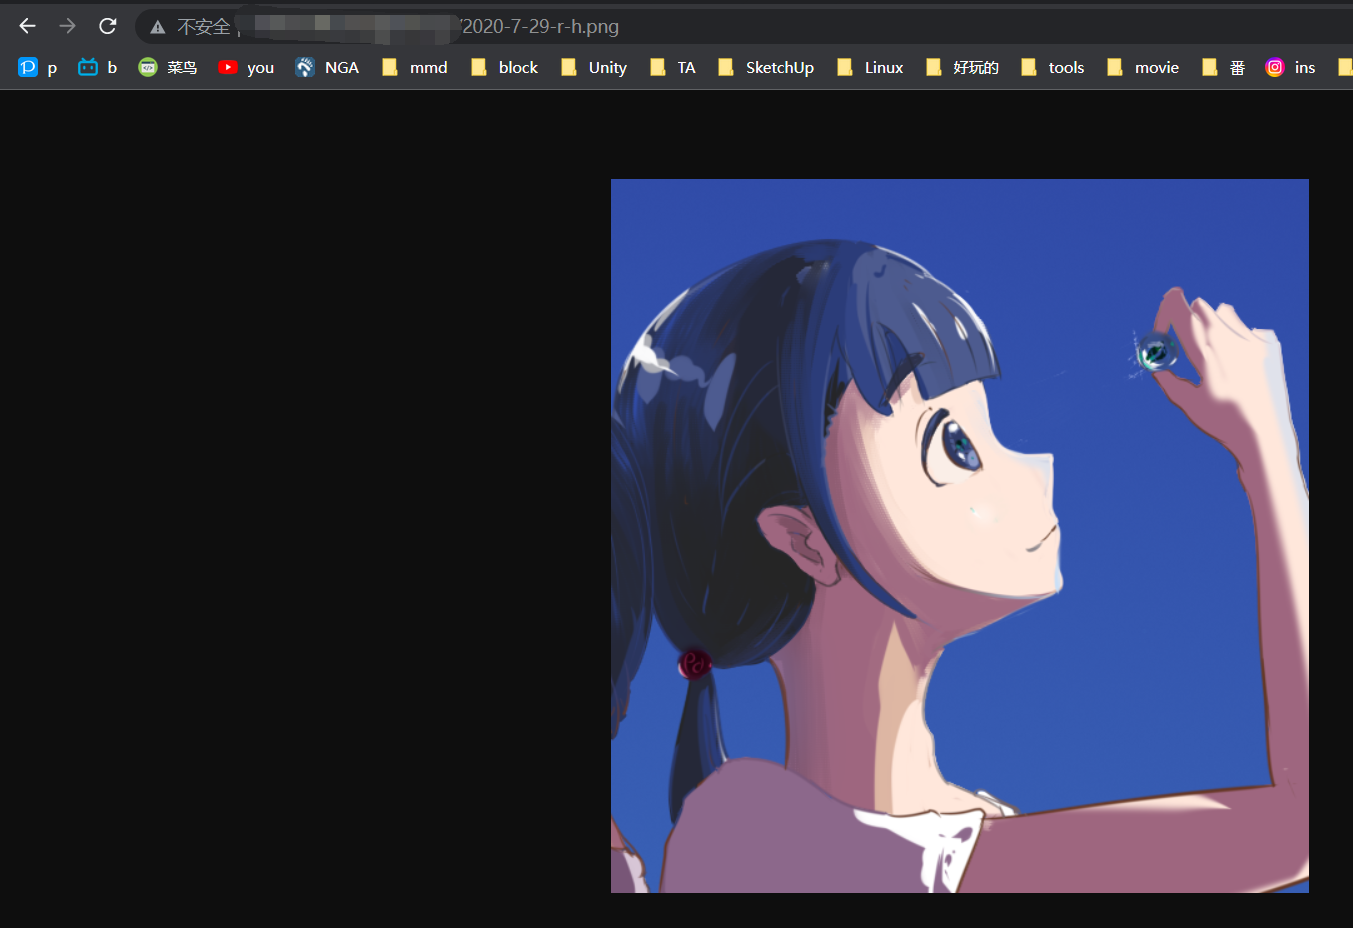
Accessed successfully, no problem!
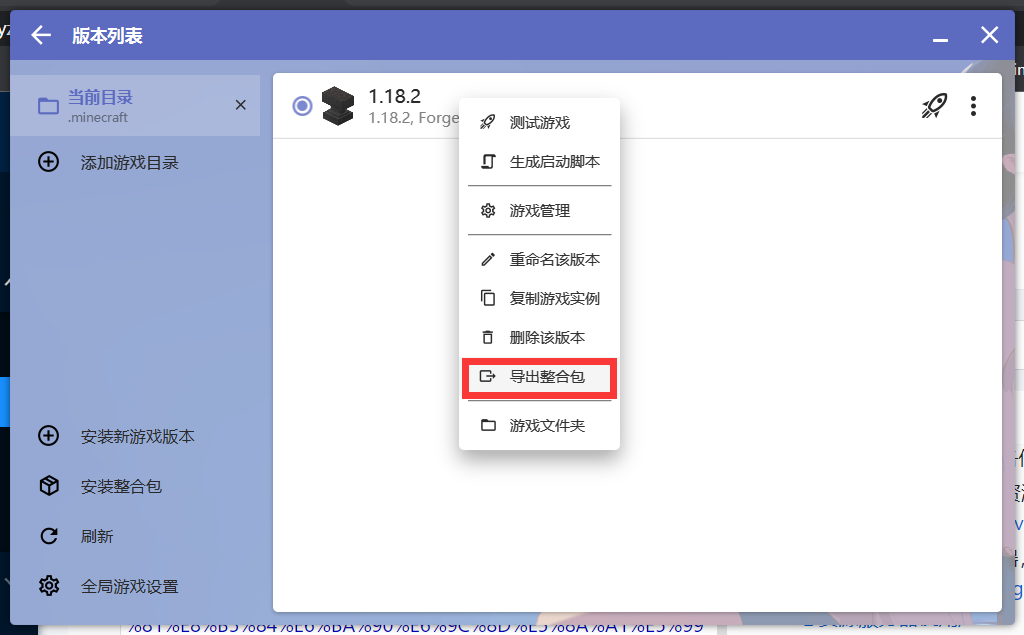
Exporting the Modpack
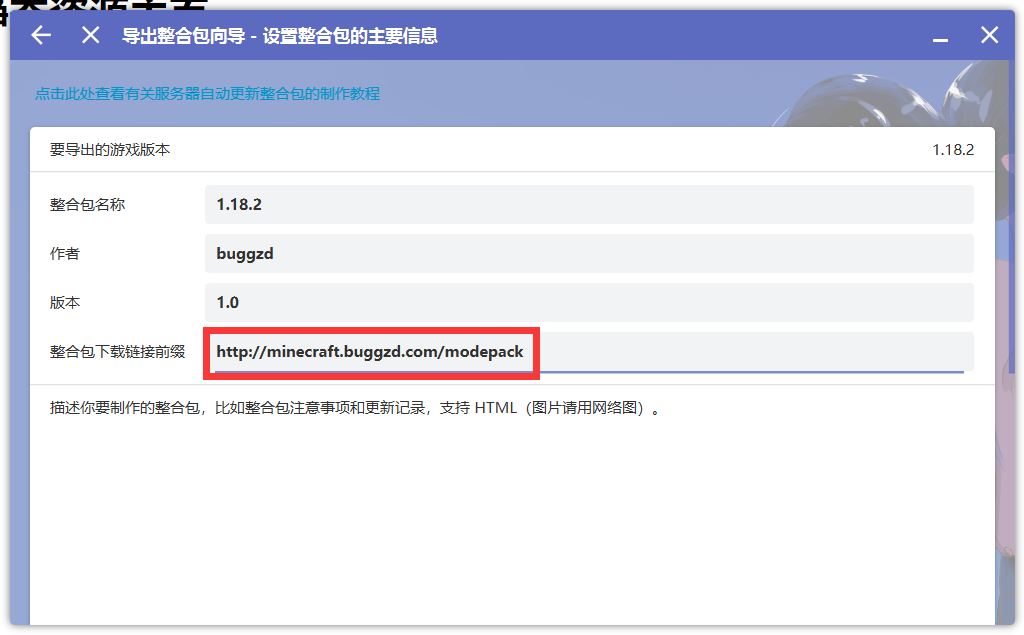
Choose Server Auto-Update Modpack
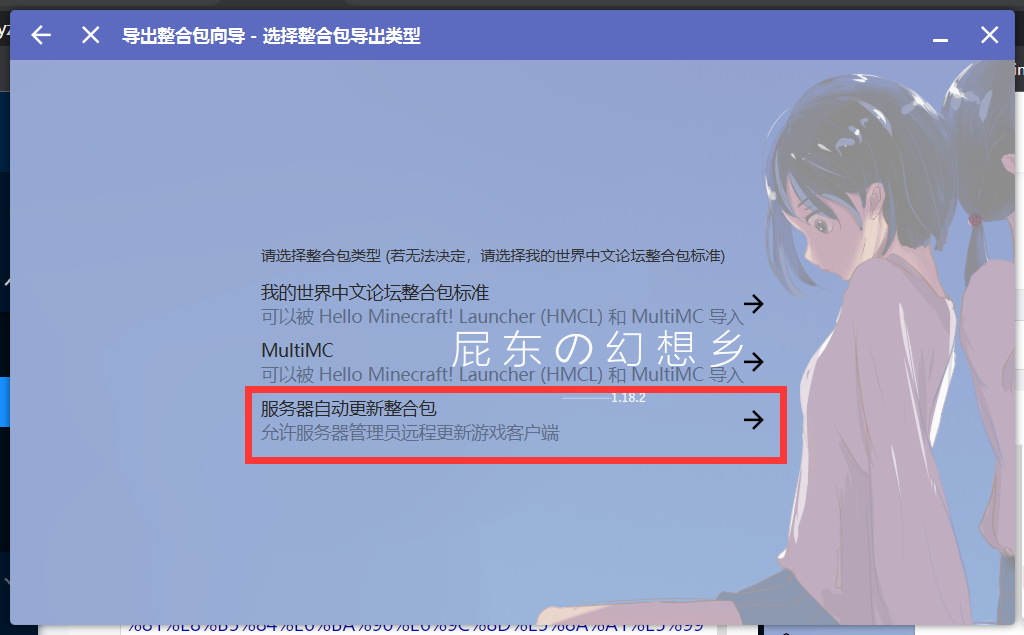
Modpack download URL prefix: fill in the address of the static resource server. We first need to create a modepack folder under the static resource folder (that is, /MinecraftClientStatic/modepack)
cd /MinecraftClientStatic
mkdir modepack
Then fill in http://minecraft.buggzd.com/modepack for the modpack download URL prefix
Uploading the Modpack to the Static Resource Server
Assume the modpack we just packaged is named client1.0.zip We upload client1.0.zip to the server via ftp, then use the extraction command to extract this modpack into the /MinecraftClientStatic/modepack folder.
# Assume we uploaded client1.0.zip to the /home/ftp folder
# Extract /home/ftp/client1.0.zip to /minecraftClientStatic/modepack
unzip /home/ftp/client1.0.zip -d /minecraftClientStatic/modepack
After extraction, let us take a look
ls /minecraftClientStatic/modepack
The server returns:
overrides server-manifest.json
Here overrides is a folder, and server-manifest.json is the modpack configuration file.
Client Initialization
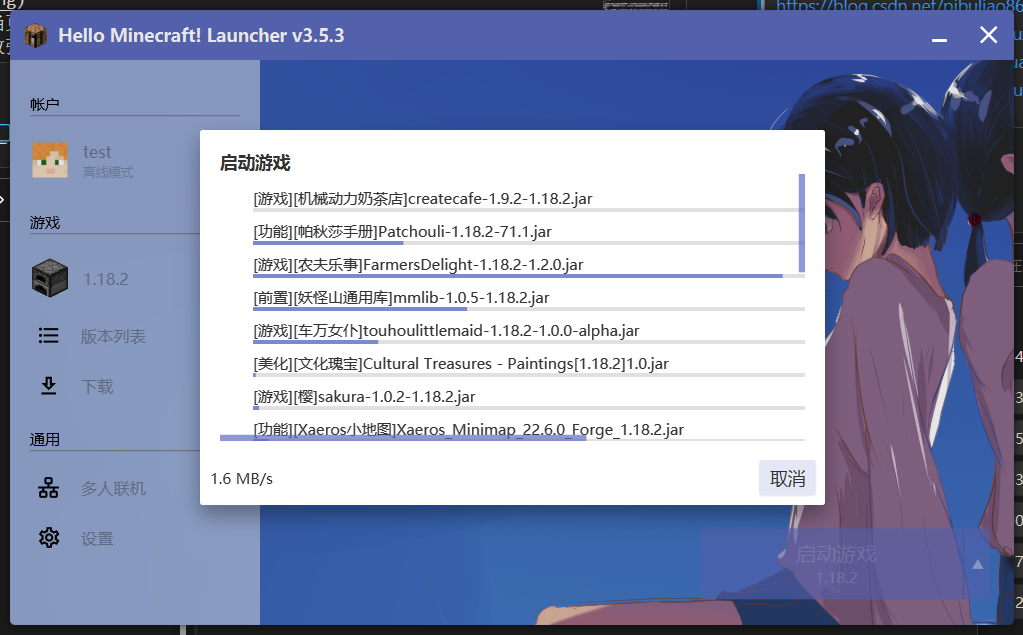
The first time you use the client, you need an empty folder—let us take newClientPackage as an example. Put an hmcl launcher in the folder, open hmcl, and import the client1.0.zip modpack you just made. Then you can pack this newClientPackage folder into a zip and send it to players. From then on, each time a player opens hmcl and logs in, the launcher will automatically query the static resource server for the modpack configuration information, and download automatically when it finds an update. When a mod is missing, it will automatically download that mod from the static resource server
Updating the Client
Currently, the HMCL version update steps are as follows:
- The launcher compares the names of local mods with those of the server’s mods; if it finds a
modthat does not exist locally, it will download it from the server. - When the
modnames are the same, the launcher continues to compare the fileMD5hashes, and downloads again if they do not match. - When an update is obtained, the launcher compares the local files once; if a mod from the old version has disappeared in the new version, the launcher will automatically delete that mod locally.
- Resources that are not updated by the remote server will not be deleted by an update. In other words, if a player modifies the modpack themselves, the mods they put in will not be deleted.
When you want to add new mods, you need to re-export the modpack after adding them, e.g. client2.0.zip, with an increased modpack version number, and then re-upload the modpack to the static resource server.
cd /minecraftClientStatic
# It is recommended to delete this directory directly and then create it again
rm modepack -R
# Re-create the modepack folder
mkdir modepack
# Extract the new client modpack
unzip /home/ftp/client2.0.zip -d /minecraftClientStatic/modepack
After the player starts hmcl, the launcher will detect the version update and automatically update the mods.